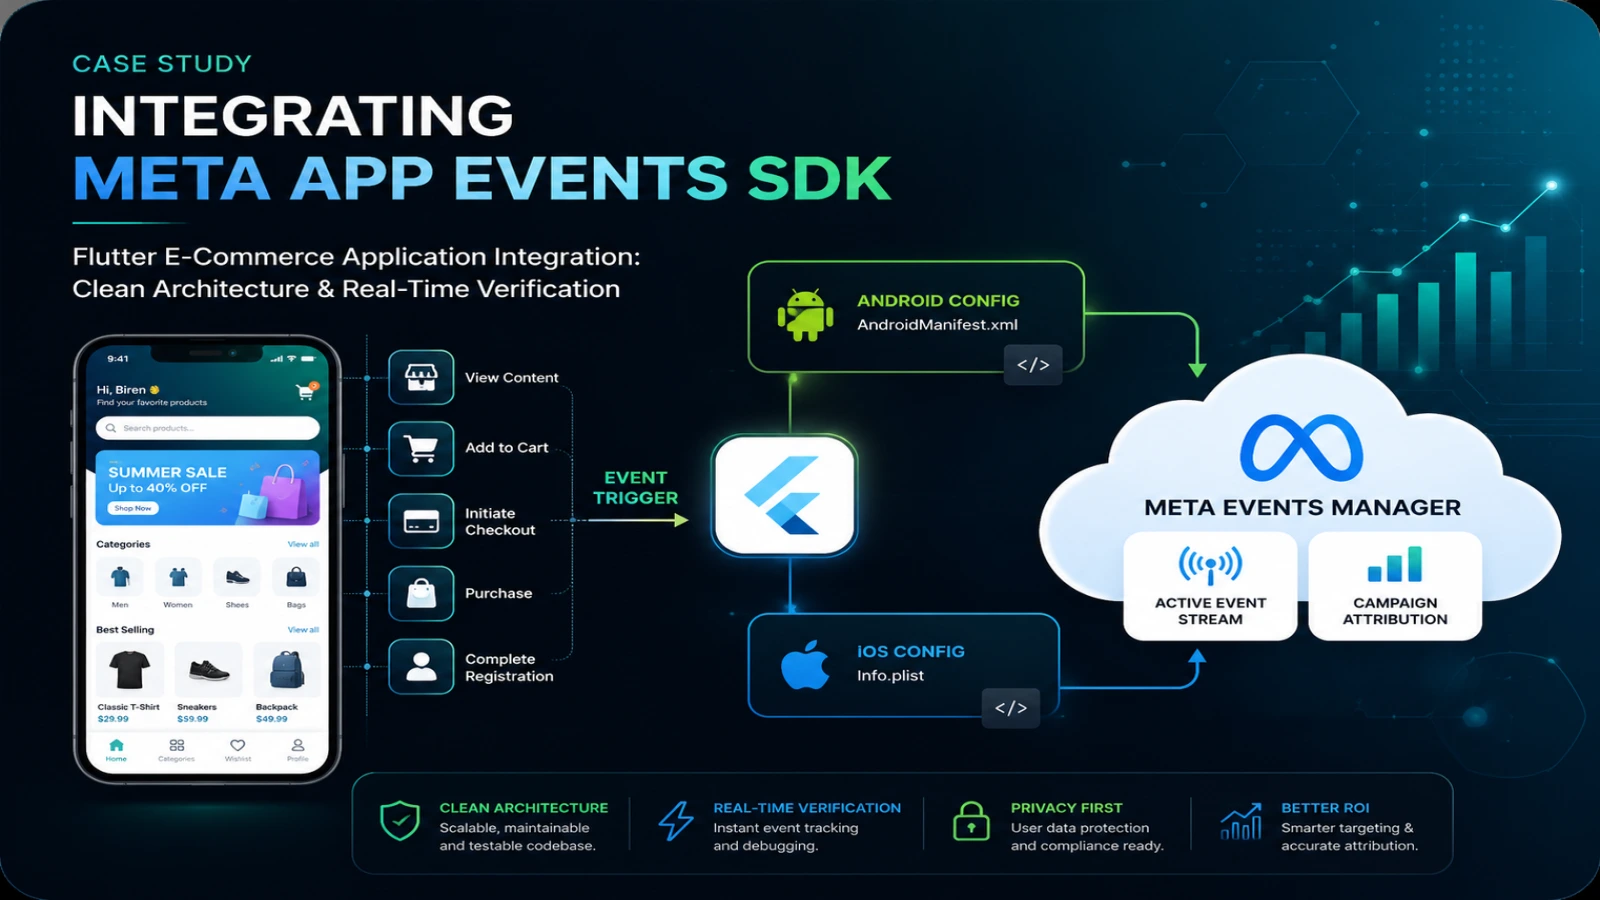
1. Business Portfolio & Developer Setup
-
Create Meta Business Portfolio: Go to business.facebook.com/overview, register your Business Portfolio, and complete primary email verification.
-
Developer Registration: Visit developers.facebook.com, complete identity verification, and link your developer profile to the Business Portfolio.
-
App Registration via Use Cases: In the Developer Dashboard, click Create App, select the modern use-case flow (Create & manage app ads / Authenticate via Facebook Login), link it to your Business Portfolio, and copy the assigned App ID.
2. Unified Dataset Hub & Credential Provisioning
-
Initialize the Dataset: In eventsmanager.facebook.com, ensure your Business Portfolio is selected, create a unified Dataset, and navigate to Settings → Linked Data.
-
Link Mobile Asset: Connect the mobile App ID to the Dataset so all incoming client events route directly to the Dataset container.
-
Basic Configuration & URLs: Under App settings → Basic, supply your live domain,
Privacy Policy URL,Terms of Service URL, andData deletion instructions URL. -
Client Token & Protocol Scheme: Retrieve the Client Token under App settings → Advanced → Security. The login protocol scheme must strictly follow the
fb<APP_ID>syntax.
3. Native Android Configuration & Publishing
-
Define Native Resources: Add keys to
android/app/src/main/res/values/strings.xml:
XML<resources> <string name="app_name">Your App Name</string> <string name="facebook_app_id">YOUR_APP_ID</string> <string name="facebook_client_token">YOUR_CLIENT_TOKEN</string> <string name="fb_login_protocol_scheme">fbYOUR_APP_ID</string> </resources> -
Inject Metadata in Manifest: Inside
<application>inandroid/app/src/main/AndroidManifest.xml, configure the SDK parameters and the custom tab redirect:
XML<meta-data android:name="com.facebook.sdk.ApplicationId" android:value="@string/facebook_app_id"/> <meta-data android:name="com.facebook.sdk.ClientToken" android:value="@string/facebook_client_token"/> <meta-data android:name="com.facebook.sdk.AutoInitEnabled" android:value="true"/> <activity android:name="com.facebook.CustomTabActivity" android:exported="true"> <intent-filter> <action android:name="android.intent.action.VIEW"/> <category android:name="android.intent.category.DEFAULT"/> <category android:name="android.intent.category.BROWSABLE"/> <data android:scheme="@string/fb_login_protocol_scheme"/> </intent-filter> </activity> -
Publish App: Go to the Publish tab in the Developer Dashboard, clear any pending checklist items, and submit the app to switch from Unpublished to Live.
4. Flutter Instrumentation & Real-Time Validation
-
Log and Flush Events: Dispatch events from Dart and force a flush to bypass local batching buffers during verification:
Dartimport 'package:facebook_app_events/facebook_app_events.dart'; final facebookAppEvents = FacebookAppEvents(); await facebookAppEvents.logEvent( name: 'fb_mobile_activate_app', parameters: {'platform': 'android'}, ); await facebookAppEvents.flush(); -
Test Event Verification: In Events Manager → Dataset → Test events, select App, run the application on an Android device or emulator (
flutter run -d <device_id>), and confirm real-time ingestion in the log viewer. Incoming payloads automatically clear initial Dataset alert badges.
5. Asset Assignment & Advantage+ Campaign Launch
-
Ad Account Setup & Dataset Association: In business.facebook.com/settings, configure your Ad Account, attach payment details, and link the Ad Account to the Dataset under Data Sources → Datasets → Connected Assets.
-
Launch Campaign in Ads Manager: Open adsmanager.facebook.com and create an App promotion campaign.
-
Ad Set Configuration: Select Advantage+ App Campaigns (or manual app campaign), designate your registered App ID and linked Dataset, set the optimization goal (App Installs or downstream in-app standard events like
Purchase), and define your target markets. -
Ad Setup & Execution: Attach creative assets, set destination app store links/deep links, and publish to activate real-time attribution and optimization.